
Overview
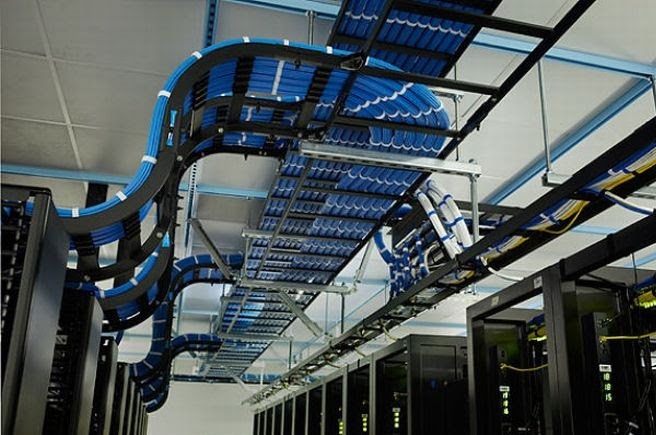
Horizontal cable is installed between the telecommunications closet and the work area outlets for workstations. It supports many different kinds of information for its users:
- Voice communications
- Data communications
- Other building information systems (such as CATV, IPCCTV)
Pulling horizontal cabling is one of the most important jobs of a successful installation. Because the cable seems bulky and well protected, some cabling installers incorrectly believe that it is almost indestructible. Cable must never be bent or kinked excessively.
Conduit installations are usually designed to be parallel or perpendicular to the external walls of the building. No one conduit segment will be more than 30 m (98 ft) in length and no more than two 90-degree bends are allowed in one segment. Exceeding these limits increases the coefficient of friction and can possibly stretch the cable and damage it.
A pull string is a thin cord used to pull cable through the conduit. The pull string must extend through the entire length of the conduit before cable can be pulled.
This can be done by a manual method using fishtape or by pressurized air methods using a foam rat or a foam ball attached to a pull string. Fishtape passes through the conduit to reach the pull string attached to the cable at the far end. Some fishtapes have swivel-type clips on the end for attaching to objects that need to be pulled back through the conduit. Fishtape is used to pull the string through the conduit, not for pulling the actual cable. Some pull string is designed to break if excessive tension is placed on the cable.
Horizontal cabling in conduit may require the use of a suitable lubricant. This is necessary only for high-pair-count cable. Many products are available for lubricating the cable as it enters the conduit to assure a smooth pull.
Always label cables and their reels prior to pulling cable into place. It is easier to identify and label the cables before they are pulled through the conduit.
The building plans or blueprints are the record of what is in the building. After the installation is complete, the building owner has the as-built plans to refer to for future work. It is a lasting record of cable information that documents the placing of cables.
Steps for Conduit Pulling
- Estimate length of run by walking off the distance or using a measuring wheel.
- Find the area on the floor that is just below the location in the ceiling where the conduit run is located.
- Walk the distance of the cable run, noting where the conduit bends and pull boxes are.
- Estimate the distance walked and allow for all changes in elevation. (e.g., include the distance from conduits to floors or ceilings).
NOTE: A common general practice is to count ceiling tiles of known lengths, such as 0.6 m (2 ft) by 0.6 m (2 ft) lay-in or 0.6 m (2 ft) by 0.6 m (2 ft) decorator tile.
- Ensure each cable dispenser has enough cable to reach the full length of the run.
- Place an identification label on each cable end.
- Label each cable dispenser and cable a few feet back from the cable’s bitter end. Do not put the label too close to the end or the tape will cover the label.
- Determine the length of fishtape required. After estimating the length of the run, add a few feet to each end to be sure enough fishtape is available.
- Feed fish tape through conduit.
- Put on all necessary personal safety equipment.
- Feed the fishtape into the end of the nearest conduit.
- Do not force the fishtape if the conduit contains existing cables.
- If there is a metallic tab on the end of the fishtape, cover it with electrical tape to prevent snagging other cable already in the conduit.
- Never feed a fishtape into a conduit without knowing where it may go. It could accidentally be fed into a live electrical junction box.
- Push the fishtape through the conduit until it comes out the far end of the conduit.
- Attach pull string to fishtape.
- Go to the far end of the conduit where the end of the fishtape is now located.
- The end of the fishtape will have a hook, a ring, or some type of attachment device.
- Attach the end of the fishtape to the pull string to be pulled through the conduit securely to prevent it from coming off during the pulling operation.
- If the clip at the end of the tape has been removed, secure the attachment by wrapping a piece of electrical tape around the pull string and the fishtape.
- Pull the fishtape out of the conduit.
- Go back to the other end of the conduit.
- Slowly rewind the fishtape reel to retrieve the pull string from the far end of the conduit, storing the fishtape in the holder as it is taken up.
- Detach the fishtape from the pull string.
- If there will be a delay prior to cable-pulling efforts, tie off the pull string at both ends. This will prevent accidentally pulling the string back into the conduit and the need to re-fish the conduit.
- Put the fishtape away.
- Overcoming pulling problems.
- Feed out a few meters (feet) of cable to prepare for entering the conduit.
- Arrange the cable(s) to form a smooth transition from a single cable to a larger bundle. Tape cables as necessary to hold them in place while the pull string
- Attach the pull string using a rolling hitch (three half hitches and a clove hitch). Each half-hitch will bite into the cables and prevent them from slipping. The clove hitch is of little importance as long as a tight knot is placed around the cables after each half-hitch. Place electrical tape over the knots to prevent them from slipping or becoming caught during the pull.
- Attach a trailer string to the cables to provide a string for future pulls.
- As the cable is being pulled through the conduit, keep slack available at the entrance so the cable can flow freely into the conduit.
- Guard against developing excessive bends or kinks as cable is led to the conduit.
- Some conduits may require the use of pulling lubricant to prevent excessive pulling tension on the cable(s).
Pulling the Cable
- Maintain proper bend radius of four times the diameter of the 4-pair cable.
- Monitor pull force closely during installation to be sure that the manufacturer’s specifications are never exceeded.
- Maximum pull force for one 4 pair, 24 AWG cable is 110 N (25 lbf ). Bends and lubricants also affect performance.
- Avoid excessive tension and deforming of the cable when going around corners or bends.
- Consider using a 11 kg (25 lb) breakaway swivel attached between the pull rope and the unshielded twisted-pair (UTP) cable to ensure that no more than 11 kg (25 lb) of tension is exerted on the pulled cable.
- Leave enough slack in the TC to reach the furthest corner and add the distance from floor to ceiling. This allows service slack to be stored within the closet for any possible mistakes or future reconfigurations.
- Most optical fiber distribution cabinet manufacturers require an additional 3 m (10 ft) of slack within their cabinets in addition to the service slack described above.
- Allow enough slack to ensure a minimum of 0.3 m (1 ft) of slack for copper conductor cables and 1 m (3.3 ft) of slack for optical fiber cables at the work area after termination.
- Tie off both ends of the trailer string.
Identify cables.
- Once the amount of required service slack has been determined, mark the cable prior to cutting it off the cable dispenser.
- The cable label shall be a unique identifier that is clearly visible on each end of the cable after the pull is complete. If this is a temporary label, ensure that the person who follows can understand it.
Document cable information
- Obtain a copy of the plans or blueprints.
- On the plan show clearly what type of cables were installed.
- Document the origination and termination point of each cable.
- On the plans show clearly which conduit was used.
- Describe the application of the installed cables.
- Install a label on the cable at each end that conforms to the labeling scheme to be used on the project. The label should identify the cable(s) so that the cabling installers will be able to identify the cables for termination. When terminating the cable, permanent labels should be installed.
Job site clean-up
Keeping a job site clean prevents development of safety hazards, reflects on the professionalism of the cabling installer and the cabling installation company. General housekeeping specifics include but are not limited to:
- Picking up used pull strings and pull ropes immediately after use.
- Disposing of removed sheath and wire scrap from cables terminated in closets.
- Storing cable reels and boxes when pulling function is complete.
- Placing termination scrap in an appropriate container while terminating cables at work area outlets.
- Vacuuming residue from cut-outs in gypsum walls.
- Disposing of all personal-use items (i.e., luncheon materials, coffee cups), and used cleaning supplies.
- Storing tools and equipment properly at the end of the work day.
